Approaching a New Strength Cycle

Don’t let this be you…. 😉
We recently tested our Deadlift Max to prepare for our next strength focus and there were all kinds of PRs! Great work guys! Very soon you’ll see us working in class on those deadlifts, building to what will hopefully be a new PR at the end of the cycle!
Today, in preparation for the next deadlift cycle, we wanted to re-share an article and video that Coach Tim wrote a while back on proper set up & execution of a deadlift. Check it out, hone your skills, and let’s get some more PRs!
Recap of Some Key Components of the Deadlift
Anyone that has performed the deadlift, knows that it can be an extremely gratifying lift. The picking up of heavy objects can produce a feeling of empowerment. Performed properly, the deadlift is a lift that allows us to maximize our strength potential and physically express that potential. Notice I did say “performed properly”. This is important because while you may get away with sub-par reps every now and again, you will never know your true potential because the injury bug will eventually bite you. Even if maximal strength is not on your radar, these key points should be of note for you, if longevity and living that happy, healthy life are of import.
We can break the deadlift down into 3 critical phases.
- Set-up
- Execution
- Finish
If one of these areas is not up to standards, you probably won’t be training long or you will be chasing your own tail through a pattern of “every time I get close to a new PR, my back starts acting up”. So let’s take a closer look at the the aforementioned phases, and some key points for each phase.
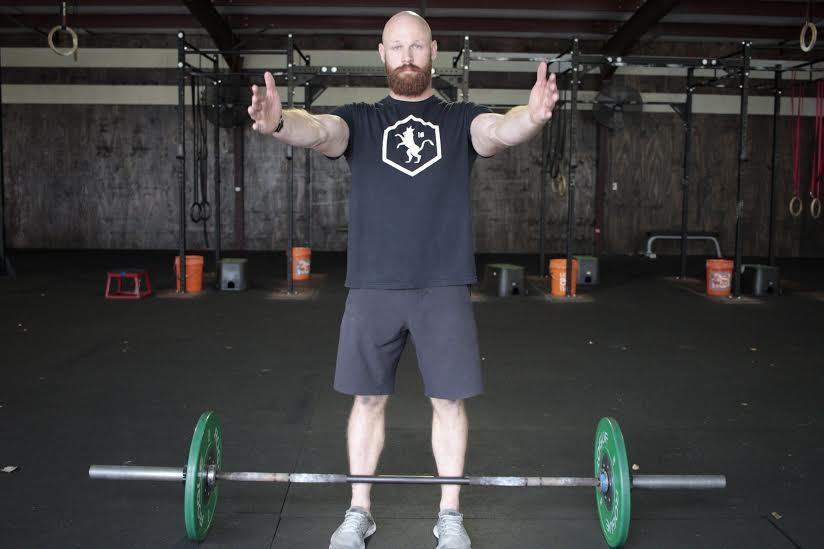 Set-up
The set-up is crucial for all multi-joint lifts. It is the foundation for us to build upon. The “Frankenstein Monster Set-up” is a quick, effective way to prepare
yourself for the deadlift. Without exhausting every “trick in the book” or “cues”, we can break this phase down into several key focal points.
- Stand with your feet in a comfortable stance, somewhere around hip-width, and shins touching the bar.
- Lift your arms in front of you and rotate your thumbs towards the ceiling.
- Pull shoulders back and down.
- Glutes tight, ribs tucked.

This initial position, even before attempting to grab the bar is important. For the beginner, it helps us recognize or “feel” a solid position. Next…
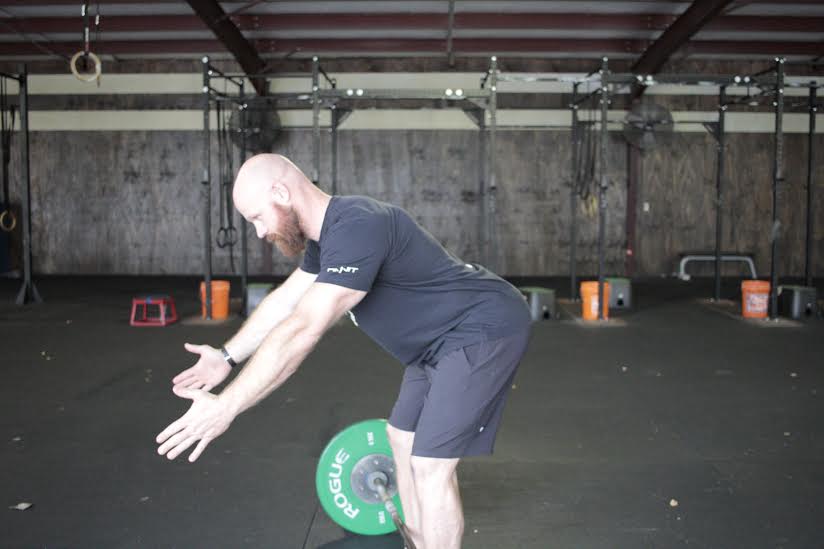
- Send your hips back without surrendering your neutral spine. This is referred to as the “hinging” or “hip hinge”
- With a soft bend in the knees, grasp the barbell with one hand, then the opposite hand.
- Lifting your chest to remove any slack out of your arms, should consequently remove any slack out of the bar.
- Maintain solid grip on the bar, push your butt toward the ceiling

- Maintain vertical shins and pull with your hamstrings to ratchet your hips down into your starting position.

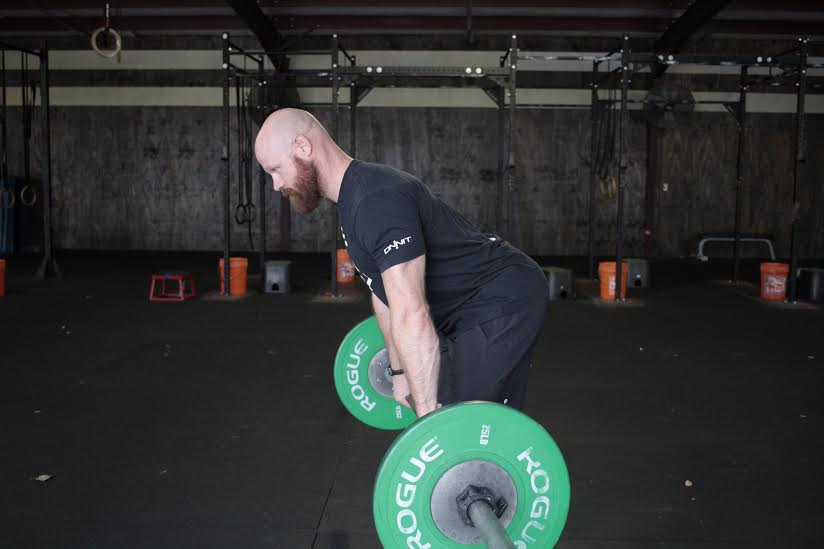
Execution
Once we have established a proper set-up, we can begin to execute the movement.
- Gently screw your feet into the floor.
- Maintaining a neutral spine, take a deep inhale.
- Squeeze your knees back and drive your hips up.
- Once your the barbell clears your knees, keep the bar close to your body and your hips begin to come forward to meet the bar.
Finish
The finishing position is simply standing upright and squeezing your glutes, ensuring that your shoulders are on top of your hips. Finishing with tight glutes can’t be stressed enough. It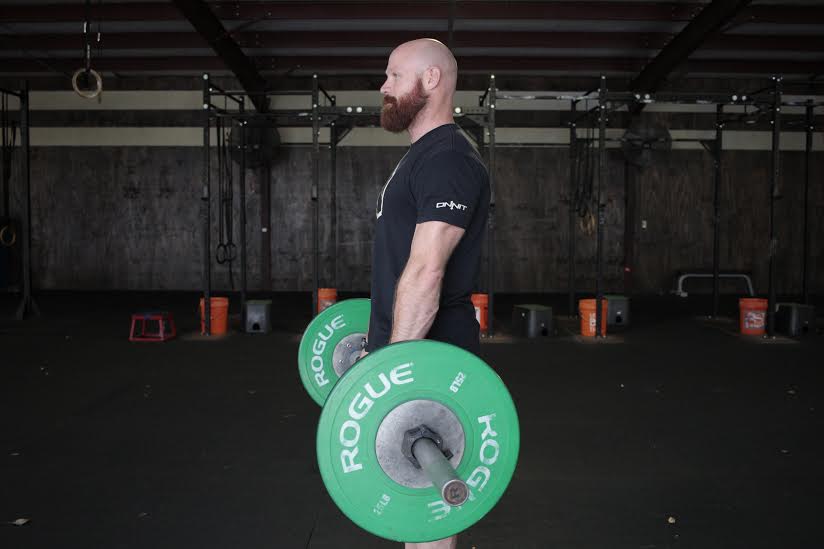 helps us perform the lift properly, but more importantly it helps us perform the lift safely. Athletes that are unable to squeeze the glutes at the top of the lift all too often experience either some acute or chronic low back pain. This pain is experienced because the athlete moves the fulcrum from the hips (hip hinge) to the low back. Thus the load is shifted to the low back.
A few key takeaways;
*Maintain a neutral, braced midline from set-up to finish.
*Knees back, drive hips up.
*Squeeze glutes to finish lift.