Kitchen Adventures || Snacks!
If you’ve noticed some grumpier than usual people around the gym the last few days, it’s because there are about 23 of us that are 5 days in to the Whole Life Challenge. Don’t worry, we’ll all even out soon, but maybe for the next couple of days don’t hold us accountable for the things we say in our severely lacking state 😉
All kidding aside, this amazing group of folks that chose to join us on this journey has made some big changes this week. You’ve seen me post enough info on WLC so I won’t go too deep into, but we’ve chosen 1 of 3 nutrition levels, set sleep, exercise, and water goals for ourselves, among other things like a daily reflection and really just turning our attention to our own lives and habits.
Each nutrition level has a list of non-compliant foods. Kickstart level is for those who are really JUST starting to make some changes. It definitely cleans up the diet, but allows for more flexibility than the other two. Remember, change comes in stages.
Lifestyle is more restrictive. Things like dairy, grains and flours, alcohol, and additives are on the “non-compliant” side making you have to really choose the cleanest options when going through the grocery store.
Performance is for the hardcore folks. It’s very restrictive. ZERO additives are allowed. No grains, dairy, alcohol, or any of that stuff either. If you really want to get clean with your diet, this is the way to go, but it is not for the weak-hearted.
The one thing that all 3 levels have in common is cutting out the extra sugars. Kickstart does make allowances for things like honey & agave nectar, but for Lifestyle and Performance, no added sugars, no honey, no sweeteners (aside from monkfruit, dates, or stevia).
You guys would not believe how many grocery items have added sugar. Don’t believe me? Take a look! Canned vegetables, chicken broth, frozen fruit…. not all brands, but you’d really be surprised at how many ingredients lists have sugar.
So, if you see some of us acting a little cranky, it’s because we have cut out some of the things we enjoy regularly (um.. queso???) and our brains and bodies are in the process of balancing all of that out.
Long intro, there to this weeks Kitchen Adventure, but I wanted to give a shout out to my WLC crew. They’ve already become a real team, working together and encouraging each other and we’re not even a week in! Watch out y’all because in about 5 more weeks we’re all going to be lean, strong, healthy, and ready to take on the Holidays!
Ok, on to the recipe. I actually have a few things here. Any time I do WLC, one of the FIRST things that gets me is snack options. When you’re cutting out all the “filler foods” and crap that we stick in our mouths throughout the day, you tend to go through a period of being hungrier. These are all WLC compliant, but for anyone looking to find some healthy snack options, here we go!
***One thing to note – dates are high in natural sugars. Almond flour is just ground up almonds which are higher in fat. Don’t go crazy with your portions on these things, guys. Everything in moderation.
Carrot Cake Energy Balls


All raw, All vegan, All delicious
INGREDIENTS
2 cups of shredded carrots (I just buy the matchstick carrots in a bag because it’s easy and ain’t nobody got time fo’ that)
1/2 cup of walnuts
3/4 cup of pecan halves (honestly, you can use any nuts you like. I’ve done hazelnuts and almonds before too)
5-6 large pitted dates
1/2 TBSP cinnamon
1/2 tsp ground ginger
1/2 tsp nutmeg
shredded coconut for coating
INSTRUCTIONS
Blend carrots in a blender or food processor until finely chopped, then add the dates and continue to blend until well combined *It’s extremely helpful to slice the dates before blending. Throwing the whole thing in makes it very difficult*
Once the dates and carrots are well mixed, add the nuts and spices and blend to combine. You can make the ingredients as fine or as chunky as you like. You should end up with a consistency that allows you to roll them into balls.
Use a spoon or melon baller to scoop out equally sized amounts and roll them into balls. Roll them in shaved coconut for an optional coating.
Refrigerate for 20-30 minutes before eating.
Store them in a sealed container in the fridge! You won’t need to store them long because you’ll probably eat them all in a couple of days.
***The last time I made these, I also added about 2 TBSP of chia seeds to the mix. Chia seeds are FULL of antioxidants, minerals, Omega-3s, and are good for so many different things. Definitely one of my favorite little super foods! You can check out some of the health benefits here.
Ok, sweet tooth is covered! Now let’s get something for those savory folks
Almond Flour Crackers
You can season/spice these with any combo you like. Just use the basic outline and go nuts! Some others I love, sea salt & lime, rosemary & Himalayan pink salt, Italian season, salt & vinegar, the list goes on and on….
 INGREDIENTS
1 cup almond flour
1 egg white
1/2 tsp salt
1/2 tsp chili powder
1/2 tsp garlic powder
1/2 tsp cumin
1/4 tsp onion powder
1/4 tsp paprika
DIRECTIONS
Preheat the oven to 325. Combine the dry ingredients in a large bowl and mix well. Add the egg white and mix until you’ve formed a dough.
Roll out the dough between two pieces of parchment paper, as thinly as possible. Thicker dough will require more bake time and result in thicker crackers. Remove the top layer of parchment paper. Cut the dough into desired shapes. I usually just use a pizza roller and cut them into triangles.
Move the dough, with the parchment paper, onto a baking sheet. Bake for 11-13 minutes, until golden brown. Depending on your oven you may need a little longer to achieve a crunchy chip. Just be careful not to over cook! Let them cool for about 5 minute before removing them from the sheet so they “set”
Remove and enjoy! These are fantastic with guacamole. (see below for my recipe)
Clean & Easy Guacamole
INGREDIENTS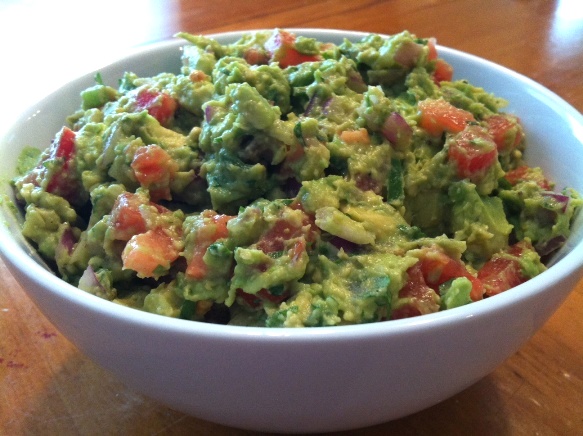
3 Large avocados
1 large tomato
1/2 an onion
1/4 cup finely chopped cilantro
1 large jalapeno
*OR if you want to go super easy like I do, just buy THESE 😉
1/2 tsp garlic powder
1/4 tsp dried minced onion or onion powder
Pinch of cumin, to taste
1/8 tsp cayenne pepper
1/4 tsp salt
1-2 small limes
DIRECTIONS
Halve and pit the avocados. (reserve 1 pit) While still in the skin, use a knife to slice into cubes, then use a large spoon to scoop the chunks into a mixing bowl.
Finely chop your pico ingredients (or open your pre-purchase pico 😉 ) and add to the bowl. Mix the avocado and pico until combined.
In a small bowl, mix your dry seasonings, then add to the large bowl along with the juice from one lime. Mix until well combined. I like my guac chunky and with lots of lime (lime juice also helps to preserve it), but you can smash away if you like it smoother. Add more lime (I usually use 2) if you prefer!
I don’t know if this really works or not, but if you store your guac with the pit it supposedly helps to keep it from browning. Make sure you cover it tightly to prevent air exposure and store it in the fridge. We usually go through guac so fast that we don’t have to worry about it though.
That’s it for this week, folks. Enjoy the rest of your week and happy snacking!
-G