Hey Everyone!
Parkinson’s Law: “Work will always expand to use all of the time and money allocated to it.”
Or as Isaac Asimov put it: “In ten hours a day you have time to fall twice as far behind your commitments as in five hours a day.”
We are going apply this principle to make your life better.

When people used to ask “How are you doing?” the default answer was always “good” or “alright.”
It appears that this has been supplanted with the modern mantra: “BUSY.”
Why is that?
Why is it that we spend less time than our forebears doing chores, getting from place to place, being forced to watch commercials, waiting on food to cook, etc. and yet we feel more ‘busy’ than ever?
One of the primary reasons is that we are consuming more media. We are filling every minute with social media feeds, news, videos, and games. We have more ‘free’ time than any generation in history, but we have so many more convenient things to do with it!
For example, people used to watch a 2-3 hours of television at night. A lot of that was commercials and shows that weren’t exactly what people wanted to watch (so they might do other things at the same time like cook dinner, or read the paper). Now days, you’ll turn on Netflix and watch for 4 hours of back to back shows of exactly what you want to see. You may end up browsing Facebook or Instagram at the same time, but you will definitely be more engaged than when you were watching an ‘okay’ show with a commercial break every 5-7 minutes.
The problem is that these new activities are DESIGNED to keep you on as long as possible. Companies have spent billions of dollars figuring out how to keep you scrolling, clicking, and engaging. They have trained us to reach for the app as soon as we have the smallest moment of boredom or when we need a break from whatever we are doing.
Even when we are deep into another task or conversation, the ding, the beep, and the buzz, call us back to the fountain of distraction. There is a reason why the alerts on the screen are red. This is because red is the most catching eye color (possibly linked to our primal brain looking for ripe fruit or danger). These alerts are like little electric zaps to our brain to stop what we are doing and get back to scrolling, clicking, and engaging.
What does this have to do with Parkinson’s Law?
At work, if a project is supposed to take 2 weeks, it will take 2 weeks (or longer). That is because the amount of work you’ll do on it will grow to fill the time allotted. We will not finish the project early and then blow off the rest of the time. We will find details to nitpick. We will do more research, have more meetings, or add more features… (exactly what I did when making these brilliant illustrations).
This is also true in the rest of our lives. If we stack our time with all of the things we want to get done, and there is some extra time left over, we’ll try to squeeze in more (to ‘get ahead’), or we’ll fill the time with more scrolling, clicking, and engaging (when we should be being productive). We’ll be distractedly loading our truck with stuff while racing toward a ‘burnout cliff’.
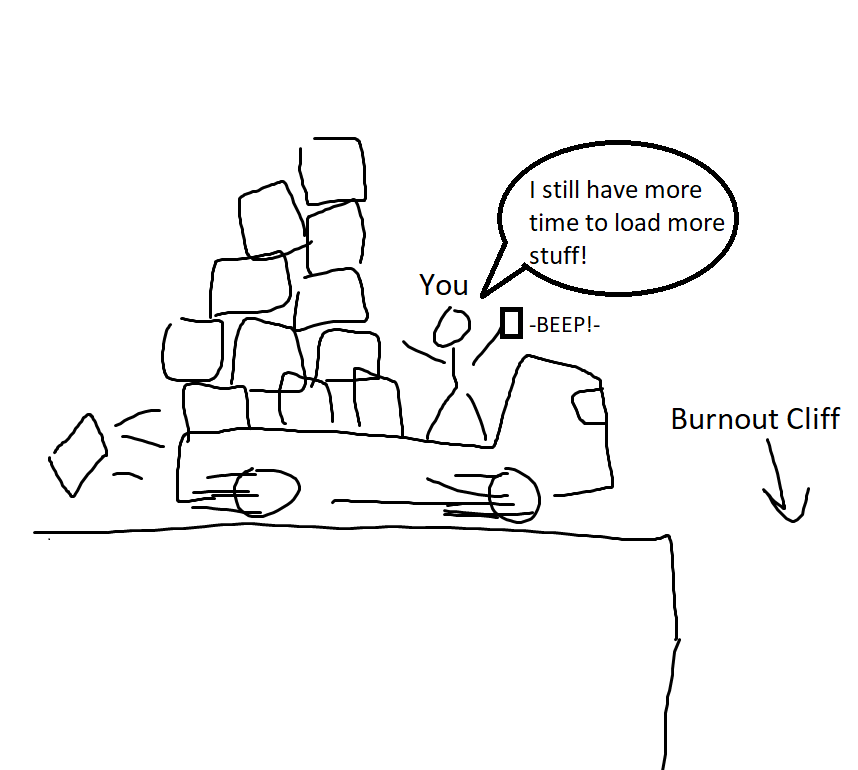
After the dust has settled, after everything else is done, THEN we’ll find time to ‘Recharge’. To workout… or take a day to ourselves… or to spend time with our families.
The equation looks like this:
Total Time (to get things done) – Tasks (time to get them done) = Recharge Time
The problem with this is that we’ll never run out of tasks to get done, so we’ll never have time to recharge. We’ll keep packing that schedule with more and more tasks, and we’ll fill in the gaps with more ‘neutral/wasted’ time of scrolling, clicking, and engaging. Not to mention, those dings, beeps, and buzzes make us less effective at our tasks because we keep switching modes, making them take longer than needed.
Side Note: There is no place this is more prevalent than with a business owner or a large family. With a business owner, there is no end to the tasks that need to get done; More cleaning. Updating the website. More meetings. More product development. More research. More organizing and filing. More tracking… With families it is; More activities. More time on homework. More chores. More outings…
To combat this, we need to switch up the equation a bit (don’t worry, if you aren’t good at math it is still pretty easy to follow).
Total Time (to get things done) – Recharge Time = Tasks (time to get them done)
What we are effectively talking about is that we need to put times on our calendar for Recharge Time BEFORE we stack our calendar with tasks and events that need to get done.
This simple shift will do a number of things for you (and your work, and your family)
First, you will create a sustainable schedule. You will be able to maintain this schedule for the rest of your life because you won’t be playing chicken with the burn-out cliff. You’ll be able to handle stress better. You’ll be happier and more relaxed. You’ll be a better spouse, parent, friend, and coworker. You’ll also be able to handle any curveballs or busy seasons as they inevitably pop up.
Next, you’ll find that you work more effectively. Jeff Bezos of Amazon HATES term ‘work life balance’because it implies an either/or mentality. A tug-of-war between the two. He believes in work life synergy. That if your work life is energizing and metered, it will make your home life better because you are coming home more energized and less stressed. If you home life is energizing, it will make you better at work because you are more productive, creative, and driven.
By guaranteeing time each week to ‘Recharge’ and do life giving things, you will be more excited about work. You will be more creative, more productive, and much more fun to work with. By preventing work from stealing your ‘Recharge’ time, you’ll have more time to take care of yourself, to learn, to grow, and to be present with your family and friends.
You will also learn how to work more efficiently. Instead of working on that project at night or on the weekends, you’ll work your hardest when you are supposed to. Then you’ll hit ‘submit’ when it is ‘good enough’ (instead of spending time on the extra stuff because you still have time). You will find it easier to turn off the alerts and stick to the task, rather than let yourself get distracted with work that is ‘urgent’ rather than ‘important/productive’.
Finally, you’ll also discover how to say “No”.
You’ll have a more realistic idea of what you can do in a normal week, and you’ll be able to select what you want to spend your time on. Instead of saying “yes” to the extra events/projects/edits, you’ll say “No” or you’ll say: “Yes, BUT…” As in: ‘yes I can do that, BUT it is going to take an extra week or two, and these other things will be put on hold’.
With the original equation, you’d ‘find the time’ by sacrificing your Recharge Time. With the new equation, you’ll be able to protect yourself from overcommitting/burning out, making mistakes, and missing decades of living a great life.
What does it mean to “Recharge”?
Everyone’s Recharge time is going to be a bit different. It is usually a good idea to break it up into three categories: Small Charge, Medium Charge, and Big Charge.
Small Charges are what happen during normal days of the week where you have work and school schedules to work around. We cultivate these small charges by doing things like holding to a schedule of going to the gym 3-4 times a week. Not working past 7pm. Spending 10-30 minutes regularly meditating, praying, or journaling. Setting a rule of ‘no electronics during dinner’. Avoiding too many commitments during the week that will cut into quality time.
Medium Charges are our once per week ‘Sabbath’ and/or 2-3 days every month or three. Times where we choose to not answer work email and/or go on social media. Time we can spend doing the things we love with the people we love. It could be going to the gym to do fun things with friends, or it could be staying home to play games with the family. It could be doing projects around the house or doing charity work. It could be a long weekend camping or visiting friends/family away from the usual hustle and bustle of the daily grind.
Big Charges are vacations. We need these 1-2 times per year. A week at a time is minimum (2 or more weeks is better). It will take most people 2-4 days to finally relax and get the maximum benefit. It doesn’t have to be elaborate or expensive. Going on a road trip, camping, visiting relatives (that you like) are all good options, but leaving the country is better. The key is to ‘leave work at the office’. Don’t obsessively check email while you are gone.
Vacations are particularly important for businesses/work.
If you own the business, this is your chance to test the systems and people you have in place to see how the place runs when you are gone. It is a way to create more efficiency and assign responsibility. The goal is to take longer and longer ‘breaks’ from your business to make sure your business is able to thrive without you (and to have the ability to focus on specific parts of the business when you are around).
If you are working at a company or with a team, this is the time for them to recognize your contributions. You will have to spend the time prepping everyone for your departure (the more ‘prep’, the more important your role). That said, you want your absence to be noticed. You want your peers and your direct reports to miss you. This signifies to the company (and your boss) that you are playing an important role and that your job cannot be easily liquidated or outsourced.
Big Charges are also times to reflect on your path. After a two-week vacation, are you energized and looking forward to getting back to work? Are you missing your colleagues and clients? If you can’t get ‘juiced’ about your career after a fulfilling two-week vacation, it may be time for you to look at moving on to something else or changing how you operate.
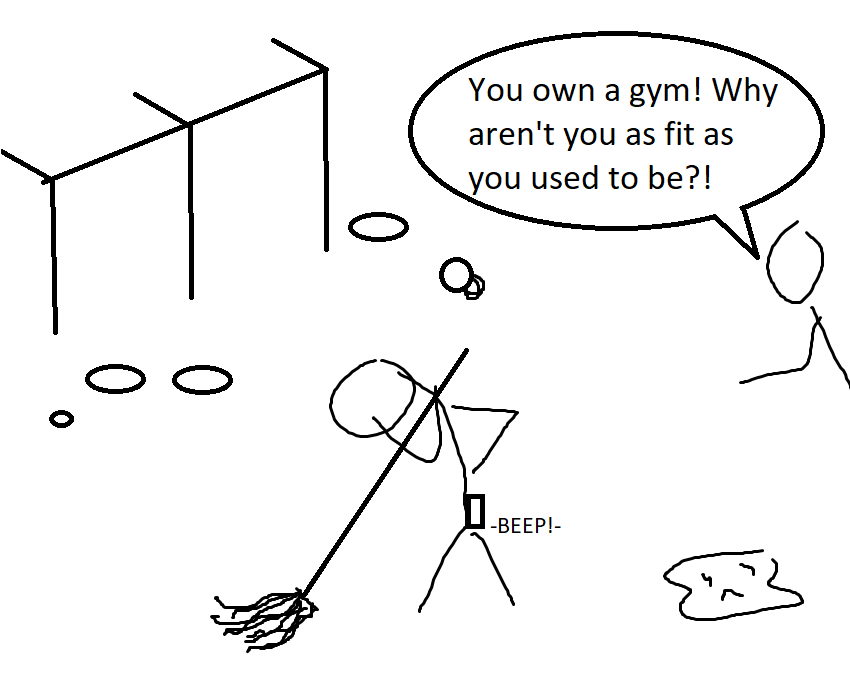
Side Note: It may come as a shock to you, but many gym owners (and small business owners in general) get into a place where they are struggling. Struggling emotionally and physically. They are stressed, and their fitness has plummeted. It is because what used to be a passion and life-giving thing, a Recharge, (hanging out at the gym with friends), has become an unending source of work tasks. They have lost one of their most critical Recharge tools! Setting boundaries and finding activities and friends outside of the business is critical to creating that work-life synergy.
Where to Start
So you may be saying to yourself “Sounds great! But I can’t do that. I don’t even know where to start!”
It starts with blocking time on your calendar and holding yourself accountable to stick to it. LITTERALLY blocking time on your calendar as a weekly appointment. It is a good idea to select a few days during your work week where you won’t take on tasks past a certain time. You can also set standards around events each day where everyone (including yourself) is required to put devices away and be present (like breakfasts or dinners).
The next big step is blocking a day off each week for that day ‘off’. For most folks, Sunday will be the day where you don’t check email and/or stay off social media completely (highly recommended). You will also want to ‘protect’ this day from other obligations that may not seem like ‘work’ but are certainly not ‘life-giving’ (like events that you feel obliged to attend, but really dread having to go).
You will also want to have a ‘long weekend’ planned every month (or two, or three). One period where you can link 2-3 days of uninterrupted time away from the grind. You do not have to leave town every time. These ‘Medium Charge’ long weekends can be ‘stay-cations’ where you stay in the area and only do things that you and your family enjoy.
And finally, you’ll want to plan those 1+ week long week vacations every year (or more). Take some of your ‘Small Charge’ time to plan these trips and bask in the planning process. Remember that planning and looking forward to a trip can be just as fulfilling as the trip itself!
Start Small
Set a schedule of making it to the gym or working out 3-4 days per week. Then pick a day or two per week where you ‘clock out’ of work and social media or games (use this time to read, do self care like meditation, journaling, family time, stretching, or a hot bath).
Next, set a day per week to devote completely to yourself and your family/friends. Sleep in if you can. Avoid the ding, the beep, and the buzz by leaving your phone behind or turning off alerts for the day.Spend the day doing things you enjoy, getting outdoors, cooking, or doing a hobby separate from work.
Then, plan that vacation. Set it one year from now or less (if you can). Put it on your calendar, and then set reminders ever month or two to make sure you are planning for a long departure (financially as well as time wise).
Keep in mind that you may have to cut things away that are sucking away your time or your life.Some of these things will seem valuable or important, but you will most likely not miss them once they are gone. Much of the importance we have placed on them is fabricated by ourselves and society. We hold on to them because we have invested too much (like watching a show that has jumped the shark on season 4 of 8), because of commitments we have made (we told someone we’d do it), or because we don’t want to be judged (we don’t want people to see us as ‘quitters’). If it is important, we’ll make it work in the time allotted. If it isn’t able to fit around our Recharge schedule, it should be dumped like useless cargo from a damaged ship.
Rainy Days, Curveballs, and Big Opportunities
So now we have a concrete schedule that we protect as if our life depends on it (because it does) … But what happens when we hit a rainy day (a string of events that requires resources not planned for), a curveball (an extreme event completely unexpected), or a big opportunity (something we’d be foolish to pass up)?
The power of creating space for Recharge Time is that we have the bandwidth and the flexibility to take on these new challenges when they come up.
There will be times where we have to ‘spend’ some of our Recharge Time to handle the emergency, to get caught up, or to position ourselves for the big win. The problem with the way most people operate is that when these things come up, they are already too stretched to handle it effectively!
They are NOT rested. There is no additional time to fit it in. They will have to sacrifice work, family, or health to keep things afloat (rather than ‘pull the oar’ with gusto). They will not be able to minimize the damage, expediate through the rough patch, or make the most out of the opportunity given.
By making Recharge Time a priority, these challenges (which are a normal part of life) will not seem so daunting and will not ‘push us over the edge’ because we have the resources to handle them.
Final Thoughts
Some ‘successful’ people talk all about the ‘hustle’. They never stop going on about how hard they are working, how many things they are doing, and how many hours they are putting in. They talk about how much you have to sacrifice to succeed. They don’t talk about how much down time they have or times they have failed because they were dropping the ball from being overwhelmed.
Other seemingly ‘successful’ people only seem to talk about their adventures and vacations. Their lives seem to be one flight to a cool destination to another. They gloss over the fact that between these events they are putting in the long hours and grinding out productivity like nobody’s business.
Don’t believe the hype.
The reality is that truly successful people, the people that have a great work life, a great home life, AND a great internal life, are using both the work moments and the Recharge moments to make their lives better. These elements work together to make them both productive AND happy.
They are doing meaningful work, while enjoying life/relationships, and they have control over their destiny…
Total Time (to get things done) – Recharge Time = Tasks (time to get them done)
Keep this equation in mind. Implement this strategy to protect your time.
If you do it correctly, you’ll have a new answer to the question: ‘How are you?’
Your answer will be:
“I am busy living a great life. How are you?”
Thrive on.
-jj
ACTION ITEM: Now that you have finished reading this, copy and paste it (or a link to it) on your calendar 2 weeks, 6 weeks and 12 weeks from now. Use these reminders to make sure you are prioritizing the Recharge Time like you should!
 goat cheese y’all). This is great as a side, on it’s own, or you could even add a protein to it and make it a whole meal.