Kitchen Adventures || Snacks!

If you’ve noticed some grumpier than usual people around the gym the last few days, it’s because there are about 23 of us that are 5 days in to the Whole Life Challenge. Don’t worry, we’ll all even out soon, but maybe for the next couple of days don’t hold us accountable for the things we say in our severely lacking state 😉

All kidding aside, this amazing group of folks that chose to join us on this journey has made some big changes this week. You’ve seen me post enough info on WLC so I won’t go too deep into, but we’ve chosen 1 of 3 nutrition levels, set sleep, exercise, and water goals for ourselves, among other things like a daily reflection and really just turning our attention to our own lives and habits.

Each nutrition level has a list of non-compliant foods. Kickstart level is for those who are really JUST starting to make some changes. It definitely cleans up the diet, but allows for more flexibility than the other two. Remember, change comes in stages.

Lifestyle is more restrictive. Things like dairy, grains and flours, alcohol, and additives are on the “non-compliant” side making you have to really choose the cleanest options when going through the grocery store.

Performance is for the hardcore folks. It’s very restrictive. ZERO additives are allowed. No grains, dairy, alcohol, or any of that stuff either. If you really want to get clean with your diet, this is the way to go, but it is not for the weak-hearted.

The one thing that all 3 levels have in common is cutting out the extra sugars. Kickstart does make allowances for things like honey & agave nectar, but for Lifestyle and Performance, no added sugars, no honey, no sweeteners (aside from monkfruit, dates, or stevia).

You guys would not believe how many grocery items have added sugar. Don’t believe me? Take a look! Canned vegetables, chicken broth, frozen fruit…. not all brands, but you’d really be surprised at how many ingredients lists have sugar.

So, if you see some of us acting a little cranky, it’s because we have cut out some of the things we enjoy regularly (um.. queso???) and our brains and bodies are in the process of balancing all of that out.

Long intro, there to this weeks Kitchen Adventure, but I wanted to give a shout out to my WLC crew. They’ve already become a real team, working together and encouraging each other and we’re not even a week in! Watch out y’all because in about 5 more weeks we’re all going to be lean, strong, healthy, and ready to take on the Holidays!

Ok, on to the recipe. I actually have a few things here. Any time I do WLC, one of the FIRST things that gets me is snack options. When you’re cutting out all the “filler foods” and crap that we stick in our mouths throughout the day, you tend to go through a period of being hungrier. These are all WLC compliant, but for anyone looking to find some healthy snack options, here we go!

***One thing to note – dates are high in natural sugars. Almond flour is just ground up almonds which are higher in fat. Don’t go crazy with your portions on these things, guys. Everything in moderation. 

Carrot Cake Energy Balls
No automatic alt text available.

All raw, All vegan, All delicious

INGREDIENTS

2 cups of shredded carrots (I just buy the matchstick carrots in a bag because it’s easy and ain’t nobody got time fo’ that)
1/2 cup of walnuts
3/4 cup of pecan halves (honestly, you can use any nuts you like. I’ve done hazelnuts and almonds before too)
5-6 large pitted dates
1/2 TBSP cinnamon
1/2 tsp ground ginger
1/2 tsp nutmeg
shredded coconut for coating

INSTRUCTIONS

Blend carrots in a blender or food processor until finely chopped, then add the dates and continue to blend until well combined *It’s extremely helpful to slice the dates before blending. Throwing the whole thing in makes it very difficult*

Once the dates and carrots are well mixed, add the nuts and spices and blend to combine. You can make the ingredients as fine or as chunky as you like. You should end up with a consistency that allows you to roll them into balls.

Use a spoon or melon baller to scoop out equally sized amounts and roll them into balls. Roll them in shaved coconut for an optional coating.

Refrigerate for 20-30 minutes before eating.

Store them in a sealed container in the fridge! You won’t need to store them long because you’ll probably eat them all in a couple of days.

***The last time I made these, I also added about 2 TBSP of chia seeds to the mix. Chia seeds are FULL of antioxidants, minerals, Omega-3s, and are good for so many different things. Definitely one of my favorite little super foods! You can check out some of the health benefits here.

Ok, sweet tooth is covered! Now let’s get something for those savory folks

Almond Flour Crackers


You can season/spice these with any combo you like. Just use the basic outline and go nuts! Some others I love, sea salt & lime, rosemary & Himalayan pink salt, Italian season, salt & vinegar, the list goes on and on….

Image may contain: food INGREDIENTS

1 cup almond flour
1 egg white
1/2 tsp salt
1/2 tsp chili powder
1/2 tsp garlic powder
1/2 tsp cumin
1/4 tsp onion powder
1/4 tsp paprika

DIRECTIONS

Preheat the oven to 325. Combine the dry ingredients in a large bowl and mix well. Add the egg white and mix until you’ve formed a dough.

Roll out the dough between two pieces of parchment paper, as thinly as possible. Thicker dough will require more bake time and result in thicker crackers. Remove the top layer of parchment paper. Cut the dough into desired shapes. I usually just use a pizza roller and cut them into triangles.

Move the dough, with the parchment paper, onto a baking sheet. Bake for 11-13 minutes, until golden brown. Depending on your oven you may need a little longer to achieve a crunchy chip. Just be careful not to over cook! Let them cool for about 5 minute before removing them from the sheet so they “set”

Remove and enjoy! These are fantastic with guacamole. (see below for my recipe)

Clean & Easy Guacamole

INGREDIENTSImage result for guacamole

3 Large avocados
1 large tomato
1/2 an onion
1/4 cup finely chopped cilantro
1 large jalapeno
*OR if you want to go super easy like I do, just buy THESE  😉 
1/2 tsp garlic powder
1/4 tsp dried minced onion or onion powder
Pinch of cumin, to taste
1/8 tsp cayenne pepper
1/4 tsp salt
1-2 small limes

DIRECTIONS

Halve and pit the avocados. (reserve 1 pit) While still in the skin, use a knife to slice into cubes, then use a large spoon to scoop the chunks into a mixing bowl.

Finely chop your pico ingredients (or open your pre-purchase pico 😉 ) and add to the bowl. Mix the avocado and pico until combined.

In a small bowl, mix your dry seasonings, then add to the large bowl along with the juice from one lime. Mix until well combined. I like my guac chunky and with lots of lime (lime juice also helps to preserve it), but you can smash away if you like it smoother. Add more lime (I usually use 2) if you prefer!

I don’t know if this really works or not, but if you store your guac with the pit it supposedly helps to keep it from browning. Make sure you cover it tightly to prevent air exposure and store it in the fridge. We usually go through guac so fast that we don’t have to worry about it though.

That’s it for this week, folks. Enjoy the rest of your week and happy snacking!


-G

Kitchen Adventures || Football + Wings = <3

It’s football season! There is a long menu of football friendly foods, but when I think football, I think wings. I’m here to tell you though, you can make a healthier version and even have the ranch! All of this is whole life compliant (for performance level too if you find a clean one or make your own mayo!)

This is definitely more work than ordering from your favorite wing place, but it’s so worth it if you’re trying to stay clean. You can chow guilt free knowing what’s exactly what’s on your plate while you’re watching your favorite team. I can’t help you with the beer… you’re on your own there 😉  (although, topo and lime is a great substitute if you just want something cold and fizzy)


BUFFALO WINGS

INGREDIENTS

  • 2 pounds chicken wings
  • ½ tsp smoked paprika
  • ½ tsp ground cumin
  • ½ tsp garlic powder
  • ½ tsp cayenne pepper
  • ½ tsp salt
  • ½ lemon, juiced
  • ¼ cup compliant hot sauce (I use Louisiana)
  • 2-4 TBSP Organic butter (to taste)

DIRECTIONS

I use an air fryer for mine (which I totally recommend buying one if you don’t have one!) but you can also just bake these in the oven. I’ve included directions for crispy oven wings below.

  1. In a gallon sized zipper bag place the chicken wings, smoked paprika, cumin, garlic powder, cayenne pepper, salt and lemon juice. Toss to combine making sure to massage the marinade into the wings well.
  2. Marinade for 30 minutes.
  3. Preheat your air fryer to 360°F. (SEE BELOW FOR OVEN INSTRUCTIONS)
  4. Place the chicken wings in a single layer in the fry basket and insert into the air fryer.
  5. Cook for 15 minutes. Remove the wings from the basket.
  6. Repeat this process with the remaining chicken wings.
  7. *Optional -While wings are cooking- To tone down the spice of your buffalo sauce, melt 2 TBSP of butter in a sauce pan and combine with 1/4 cup of hot sauce. Simmer on low for 3-4 minutes. Add more butter to bring down the spice.
  8. In a bowl place the fried chicken wings and hot sauce and toss to coat.
  9. Serve immediately.

Oven Directions –

Pat wings dry with paper towels after marinading; Bake at 250F for 30 minutes, then at 425F for 40 – 50 minutes until golden brown and crispy.


RANCH DRESSING

There will be a couple of steps to this. First we’ll make the seasoning mix. You’ll need 3/4 – 1 1/4 TBSP of seasoning mix, but this recipe with make enough that you’ll have some to store! Once we’ve made the mix, we’ll talk about combining it with different ingredients to your liking.

Seasoning Mix –

INGREDIENTS

  • 6 tablespoons dried parsley flakes
  • 2 tablespoons dried dill weed
  • 2 tablespoons garlic powder
  • 1 tablespoon onion powder
  • 1 tablespoon dried minced onion
  • 1 tablespoon freeze dried chives 
  • 2 teaspoons salt
  • 1 teaspoon black pepper

DIRECTIONS

  1. Toss all the ingredients together in a medium bowl.
  2. Use your fingers to gently massage the spices together until mix well.
  3. Store in a sealed container until ready to use.

MAKING YOUR DRESSING

To make Dairy-Free, Paleo, WLC compliant Ranch Dressing mix together –

  • 1/3 cup mayonnaise – you can make your own compliant mayo with this recipe
  • 1/4 cup canned coconut milk (regular not lite in a can, not the kind you drink – check for sweeteners!)
  • 1 – 1 1/4 tablespoon ranch seasoning mix
  • Mix all the ingredients together until combined. Start with using 3/4 tablespoon dried seasoning mix. Add more if desired.

Alternate option to mayo – I really like this with 1/3 cup of plain Greek Yogurt instead. That would be lifestyle compliant, but kicks it our of performance so choose accordingly!

Ok, guys! Like I said, it’s more work than ordering in, but so worth it! I hope your teams wins this weekend. Unless they are playing one of mine. Then I hope they lose 😉 Enjoy your wings!

Kitchen Adventures || Green Machine


The sun is shining again! I couldn’t believe it Monday when we went ALL DAY with no rain! I knew I had to go get in the river though, so I took my workout outside. I ran from home to the river, did some rounds of Cindy on a playground, and then jumped in that cold clear water and forgot about everything else for a bit!

I made it down there before everyone was getting out of school and work so I had the place nearly to myself. Being down there, surrounded by green life, being submerged in a life source… Man, it’s one of my favorite things.

Speaking of green life… ya like that smooth transition? 😉 Anyway, this week’s recipe is full of all kinds of good green stuff. This recipe is a variation of a simple concept that has endless possibilities. Very basically, this is a grain bowl. A grain bowl is layered with some sort of grain of your choice, a protein, and any combo of your favorite veggies! I’ve done many versions in the past, but I really love how this one turned out so here we go! I don’t go by a particular recipe when I make these so take these measurements with a grain of salt.. (or more to taste 😉 )


Green Machine Grain Bowl 

Ingredients:

1.5 lb Skinless Boneless Chicken Breast
2 cups (cooked) grains of your choice – I used a mix of brown rice, freekah, quinoa, and bulgar to complete 2 cups cooked
1 15 oz can of chickpeas
3 cups raw spinach
3 cups raw arugula
2 pears – pre-sliced OR slice upon serving
4 stalks of celery – chopped
1 bunch green onions – chopped
1 cup chopped walnuts
1-2 TBSP Lemon Pepper Seasoning – if you struggle with finding one that does not have added sugar, make your own! 
Olive oil and lemon juice to drizzle (or you can use a lemon vinaigrette dressing if you prefer!)

Directions:

Coat your chicken breast in olive oil and season generously on both sides with lemon pepper seasoning. Cook it up however you like! Sometimes I’ll bake mine in the oven at 350 for about 25 minutes (or until cooked through) but this time, I cooked in in a skillet on the stove. Either way… season those puppies up and make them not raw..

You should have about 2 cups of cooked grains. If you measure out two cups dry you’ll end up with way too much. Check the packaging of whatever you choose to use and it will give you proper measurements.

Rinse and drain your chickpeas. *Optional* You can saute these in a skillet to give them a bit of a toasty flavor.

The rest is easy! This amount made 4 bowls for us. Divide your grains (about 1/2 a cup per bowl), chickpeas, and chicken into 4 bowls. This will be the “hot” ingredients.

I just used zip locks for the “cold” ingredients. Divide your spinach, arugula, celery, and green onions into 4 separate containers. As for the pears, I’d suggest you leave them whole until you’re ready to eat, but you CAN pre-slice and put them in a separate container.

Serving:

HOT STUFF                                         COLD STUFF                                 ASSEMBLED


Heat your bowl with the “hot” stuff. Then you can assemble right in the bowl if it’s large enough. Mine aren’t so I transfer it to a plate, dump the bag of “cold” stuff on it. Add the pears, sliced avocado, and walnuts and then drizzle either with your lemon vinaigrette or just a little olive oil and lemon juice and chow down!

Like I said, the beauty of a grain bowl is that there are endless combinations. It’s easy to cook, easy to assemble, and easy to clean up. I was so happy with the way this one turned out. I know I’ll be making it again soon.


Happy chewing!

September Athlete of The Month || Marco Ramos!

Each month we spotlight a different CFA athlete who stands out and shows just how awesome they are. What is it that makes up an Athlete of the Month? It may not be the person that finishes the fastest, Rx’s every WOD, or gets a PR every time they walk in the gym. Although we love and celebrate when those things happen, the Athlete of the Month is made up of much more than physical ability. This person shows up, gives their best every time, and then gives a little more. They are hungry to learn and always ready to do the work. They support their fellow classmates and encourage them to reach their goals. This athlete embodies what we believe the CrossFit Austin Community should be about.

Our September Athlete of the Month is Marco Ramos! Marco has been a part of the CrossFit Austin Community for about a year and a half! From day one, he’s been a happy and welcoming guy in class. He gets in here and works hard in every single class. Marco is a perfect example of using his fitness outside of the gym with all the awesome activities he does too! He’s and outdoors man of many sorts and the training he does here, helps him enjoy that even more. Marco exemplifies so many of the qualities we look for in an AOM and has shown some awesome progress in his time here. Marco, the CFA Team is proud to honor you as our September Athlete of the Month and as an awesome part of this community. Thanks for your all your hard work and we look forward to seeing all you accomplish in the years to come! Congratulations!

Image may contain: 1 person

State your Name and/or Nickname please:
Marco Ramos


Words to live by?
Slow but steady wins the race.  

What is your fitness background?
My background is fairly new. I started my fitness journey 10 years ago. I began as a runner and completed 3 full marathons. I have done my share of workout videos such as P90X and Shaun T’s Insanity. I joined my first CrossFit gym in 2014.


How long have you been CrossFitting?
4 years 

Take us back to your first day of CrossFit… How did you feel? How do you compare it to workouts today?
I was lost in my first class.  The coach spoke in a short hand and now makes sense.  This shorthand were words to describe the work or the movements.  It was the first time I saw AMRAP, EMOM, cleans, and thrusters.What’s your favorite part of CrossFit Austin?

My favorite part is the Community. Everyone is supportive and wants to you succeed. 

Current Training Goals/PRs?
I am happy with slow growth.  I am trying my hardest not to get injured.Image may contain: 1 person, smiling, outdoor 

What advice do you have for folks just starting out in CrossFit?
I would suggest to commit for one year and attend consistently.  Don’t eat before class. 

What is your cheat meal go to?
I don’t have a go to cheat meal. If I am going to cheat, it’s going to have plenty of calories and have no nutritional value. 

How do you use your fitness outside of the gym?
I use my fitness in hiking, maneuvering in a tight space when I go caving, running town lake, around the house, or opening a jar.  

Tell us about a moment you felt most proud of yourself during a workout.
My proudest moment in CrossFit was my first RX WOD.   

If you could create a WOD and name it for yourself, what would it be?
I wouldn’t know where to begin.
Image may contain: 1 person, drink and closeup
What are your hobbies, interests and/or talents outside of CrossFit?
I like to explore and travel. I can dance East Coast Swing, Lindy hop, and Blues. I am learning how to cook.  

Tell us something we don’t know about you…
I have a level 1 sommelier, but I drink beer and spirits. I searching for the perfect Negroni recipe. I enjoy festivals such as Okterberfest. My favorite holiday is Halloween. 

Leave the fine folks of CrossFit Austin with some parting words…
“Make it so, Number One. ” -Jean-Luc Picard

Kitchen Adventures || Gimme dat soup (Whole Life Compliant!)

Hey friends! How’s everyone doing? You guys making it through all this rain? I don’t know about you, but this rainy, cloudy weather has definitely impacted my menu. I very quickly turned from cold salads and embraced the fall recipes with all the warm feelings in my heart. Y’all….. I love soups. I love stews, crockpot meals, all the cozy stuff that gives you the warm fuzzies and a full belly. I know we’re probably not really there yet and it’ll go back to just being HOT once the rain clears, but for now, I’m in it 100%.

If you haven’t heard me blabbing or seen me posting about it for weeks, 1) Pull your head out of the sand because I don’t know how you could miss my incessant reminders, and 2)…Whole Life Challenge is starting in a couple of weeks! 🙂

I’ll save you the full explanation and let you read my info post HERE, but I do want to tell you about a couple of fun additions that we will have for this challenge!

First off, we are honored to welcome Coach Dylan’s lovely girlfriend, Erika to our WLC crew. She will be graduating in the spring with her degree in nutrition and has graciously agreed to join our team as a resource to answer questions and give some informational presentations on basic nutrition (more in depth for those interested) to help us get the most out of the nutrition portion of the challenge! She’ll be at our Kick Off Info meeting// Q&A this Saturday (Sept. 15 @ 10:15 am) so if you have any questions she’d love to answer them. She’s going to be planning her talks on the things you guys want to know most, so come help us out!

Secondly, we are SO excited to test out a new service for those folks on our Whole Life Challenge team. Tim’s bother Jon, if you don’t know, is a chef. He’s currently testing out some recipes and putting together menus to offer PREPARED MEALS as an option to WLC team members! Meal prep is something we all struggle with. Even if it’s part of your weekly routine, you can still find yourself needing a little help from time to time. This beta-test will be for Whole Life Challenge members only so if you want in on the fun (and the eats), join the team!

Ok, on to the recipe! This one is compliant for all 3 nutrition levels as long as you use an adobo sauce without sugar. If you can’t find one in

your grocery store, here is an easy compliant recipe to make your own! 

*Pro-tip! If you plan ahead, Thrive Market has a ton of amazing, compliant products that don’t include a lot of the ingredients you find in regular grocery stores. Stock up before the challenge on things you use regularly like broths, sauces, etc…. it will make life so much easier!

Crockpot Chipotle Chicken Soup Recipe

Ingredients

  • 1.5 lb. boneless chicken breasts
  • 4 cups chicken stock (check for added sugar!)
  • 1 15 oz. can full-fat coconut milk (unsweetened – no guar gum for Performance)
  • 2 cups ripe tomatoes, diced
  • 1 cup white onion, chopped
  • 1 16 oz. bag of fresh spinach
  • 3 TBSP chipotle peppers in adobo sauce – more or less to taste (sauce only)
  • 2 TBSP ground cumin
  • 1 tsp smoked paprika
  • 2 tsp sea salt
  • Optional Toppings: chopped cilantro, diced avocado, lime wedges, fresh jalapeno slices, green onions….

Instructions

  • Turn slow cooker to low heat setting and add chicken breasts, tomatoes, onion, chicken stock, chipotle sauce, cumin, smoked paprika and sea salt. Cover and cook 5-6 hours.
  • Remove chicken breasts and shred with 2 forks. Add chicken back to slow cooker and stir in coconut milk. Cook an additional 20 minutes, uncovered, to reduce slightly.
  • Add the spinach and allow to wilt (appx 5 minutes) before serving.
  • Ladle soup into bowls and serve with toppings of your choice and light one of those wood wick candles so you can pretend you’re sitting cozy by a fireplace 😉

We absolutely love Siete Foods tortillas and chips (found at Whole Foods, HEB, and also on Thrive Market in addition to their own site) so I served this up with some lime tortilla chips.

Kitchen Adventures || Keepin’ it easy – One pan veggies & sausage

Happy Hump Day! I hope you guys had an awesome Labor Day weekend! We spent most of the day traveling home from Arkansas (in the rain), but we got to enjoy some relaxing time at my grandmother’s ranch, fishing, doing some yard work, and chatting with her. She is going to be 98 years old next month! She still lives on her own and does a great job taking care of herself. I’m 100% certain that she’s doing so well at her age because for most of her life, she’s eaten from her own (or her neighbor’s) garden/farm and she STILL gets up every morning and moves her body. She stretches and “takes exercises” and keeps herself active physically and mentally every day. Her movements have adapted over the years, but she listens to her body and makes it a priority. She’s walking proof that longevity is achievable!

Y’all she’d kill me if she knew I was posting a picture of her in her robe, but I had to share!


Anyway, on to the recipe. This is one that’s so easy and FULL of good veggies. Because we were driving, I didn’t have my normal meal prep day, but this takes like 30 minutes to throw together and it tastes great. Even better if you can pull from your own veggie garden 😉 Enjoy!

***FOR THOSE OF YOU DOING WHOLE LIFE CHALLENGE – This is one that is SO easy to make compliant for all nutrition levels – just check the ingredients on your sausage or substitute chicken (or steak, shrimp, etc!!) if you can’t find compliant sausage.


Ingredients

  • 1 lb Smoked Turkey or Chicken Sausage (You can also pre-cook raw sausage of your choice to add to this)
  • 2 cups sweet potatoes diced into 1/2” cubes
  • 2 cups broccoli florets
  • 2 cups fresh green beans (ends trimmed)
  • 1 cup bell pepper chopped (any colors you like)
  • 2 cloves garlic minced
  • 2 tablespoons olive oil
  • 1 tablespoon Italian seasoning (or your favorite spice blend!)
  • ½ teaspoon salt
  • ½ teaspoon black pepper

(Other options for veggies that I’ve tried – asparagus, brussels sprouts, butternut squash, zucchini, cherry tomatoes, onions, carrots…. you can really choose anything you like!)

Instructions

  1. Pre-heat oven to 400F.
  2. Slice the smoked sausage into 1” rounds. Dice the sweet potatoes into small 1/2” cubes. Chop/prep the rest of your veggies to your liking/as needed.
  3. Add the sausage, veggies and minced garlic to a large baking sheet. Drizzle with olive oil and sprinkle with the Italian spices or your favorite spice blend. Seasoning with salt and pepper. Toss veggies with your hands until they are fully combined and coated with olive oil and spices.
  4. Bake for appx. 20 minutes, flipping halfway. You can portion this out on it’s own or if you want to serve it over brown rice, or quinoa, even on top of a salad, it’s extremely versatile!

And…. just because I still can’t stop watching it – Here’s the friend we made this weekend  😆

Kitchen Adventures || Bell Peppers for Breakfast


Let me begin by saying, I love stuffed peppers. I’ve tried several recipes for stuffed peppers in thepast, but they’ve definitely catered more toward lunch/dinner options. The first time I made these breakfast peppers, I was hooked! This is another recipe that is so easy, you guys won’t believe it. The best part is that you can put any combo of meat/veggies you like to make it exactly how you want it.

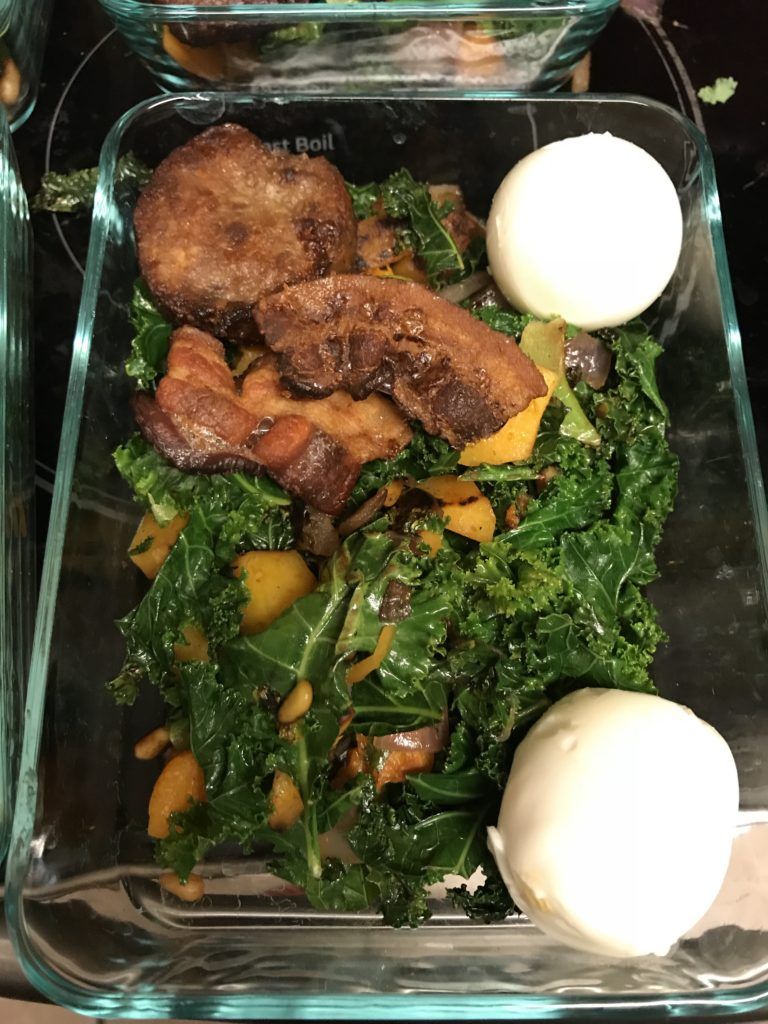
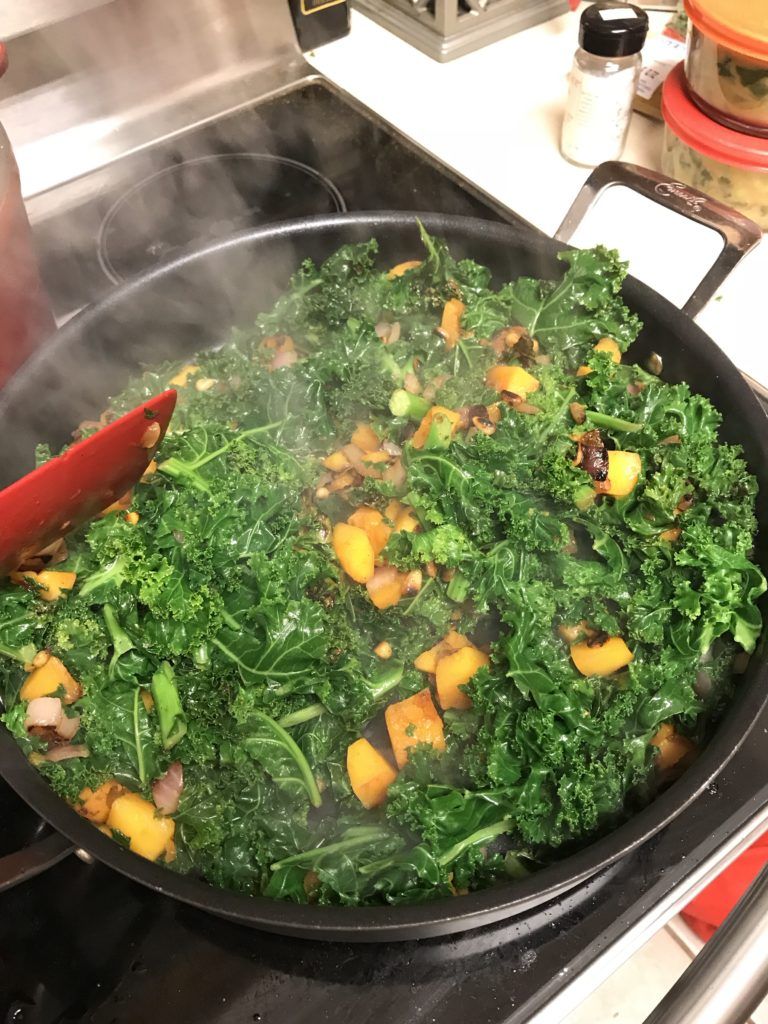
I portioned these guys out into meal prep containers with some kale sauteed in coconut oil with a touch of sea salt. Enjoy!


  • Pro-Tip – LEAVE THE STEM ON THE PEPPER… The first time I did this, I cut it out…. and all my stuff fell out…. By leaving it intact, it turns the pepper into a perfect little “bowl” and keeps all your stuff in place 😉

Other helpful notes:

  • Try to choose peppers that will be relatively when you lay them in the dish – Less likely to spill!
  • Mix up your veggies, meats and cheeses as you desire — or make several different versions in the same dish and just pour the whisked eggs right over top!
  • These stuffed peppers keep well in the refrigerator for a couple of days but aren’t great from the freezer — unless you are okay with your peppers being totally soft and mushy!


INGREDIENTS

  • 3 bell peppers halved and seeded (leave those stems on!)
  • 6 eggs
  • 1/4 cup milk
  • 3/4 tsp salt
  • 2 tbsp chopped green onion
  • 1/3 cup chopped fresh spinach
  • 3/4 cup shredded cheese divided
  • cooked meat of your choice – I used sausage *I went ahead and made the whole pound. I had a little left over, but it depends on the size of your peppers…

INSTRUCTIONS

  1. Preheat oven to 350 degrees F.
  2. Brown your sausage in a pan just until it is no longer pink.
  3. In a medium bowl, whisk eggs, milk and salt until combined
  4. Lay your peppers in a lightly greased baking dish (whatever size works — you want them to be a little snug so they don’t move too much and spill).
  5. Begin filling your peppers with your cooked meat, layering in your cheese, onions, and spinach (or whatever you decide to fill them with) Reserve some cheese to layer on the top to achieve a nice golden crust!
  6. Divide your egg mixture between your peppers and sprinkle with remaining cheese. Bake for 30-40 minutes, until eggs are set.


Night Of Champions || Back To School!

Night of Champions is our in house partner competition that offers our members a chance to compete, have some fun, and help the gym all in one night! Partners join together to give their all in this two part competition in hopes of snagging a podium spot! Don’t have a partner? Post in the members page and make a new friend! This NOC theme is “Back to School!” Grab your partner and hit the books (or the training floor 😉 )!

Teams of 2 – Male/Male or Female/Female
Rx & Scaled Divisions available!
Night of Champions will consist of 2 WODs
PART 1 – A test of skill & strength

PART 2 – A test of teamwork and conditioningMovements will be announced 2 weeks out and final workouts announced 1 week out. Stay tuned!

FRIDAY SEPTEMBER 14
6:30 pm – Athlete Check-In
7:00 pm – PART 1 Start Time

REGISTER HERE

$50 per Team (this includes registration for both team mates) Only 20 spots available!

(Only 1 registration per team needed – We’ll send an email to get division and partner name)

***Proceeds from Night of Champions will go toward new equipment for the gym!***


JOIN US AFTERWARD AT AVIATOR PIZZA TO CELEBRATE OUR SEPTEMBER BIRTHDAYS!

Kitchen Adventures || Fresh & light lunch bowls

Image may contain: 1 person, sitting


Wow! As many of you know, Tim and I took a trip out to San Diego last week to see my best friend and meet her amazing little baby. Juliette was born on May 26 at only 23 weeks gestation and let me tell you guys, she is a WARRIOR. This amazing girl is growing and developing like crazy. She’s now breathing without assistance, regulating her own body temp, and gaining weight every day. When we were there, she was just over 4 lbs. That may sound like nothing (and let’s be honest, she’s tiny!) but she was 1 lb 5.9 oz when she was born so that 4 lbs is incredible. Ok, ok… I’ll get to the recipe, but I HAD to share how awesome it was to get to meet this girl. <3


Ok… so because of our trip, my Sunday meal prep day was non-existent, but I was still able to whip up several things on Monday afternoon after work. Any time I travel or if my nutrition gets off track a bit, I crave GREEN. The recipe I’m sharing today is SO easy, full of green, and has awesome flavor. Give it a go!

Ingredients – This recipe will make 4 “bowls” 
2 c. cooked jasmine rice
1 tbsp. oil
1.5 lb. ground turkey
.5 tsp or to taste – red chili flakes
2 cloves garlic, finely chopped
1 small jalapeno (seeded if desired), finely chopped
2 tbsp. plus 1/2 tablespoon grated fresh ginger
2 tbsp. low-sodium soy sauce (or coconut aminos)
4 tbsp. fresh lime juice
1 tsp. brown sugar (or coconut sugar)
1 English cucumber, thinly sliced
2 scallions, thinly sliced
1 c. fresh cilantro
1/2 c. fresh mint
Directions
  1. Heat your oil in a skillet and brown the ground turkey. Be careful not to overcook and dry it out. Add more oil as needed. Toss with garlic, red chili flakes, and 2 tablespoons grated fresh ginger. Remove from heat and toss with 2 tablespoons lime juice and 1 tablespoon low-sodium soy sauce (adding 1/4 cup water if dry).
  2. Whisk 2 tablespoons lime juice, 1 tablespoons low-sodium soy sauce, 1/2 tablespoon grated ginger and brown sugar.  If eating immediately, toss with cucumber and scallions; fold with cilantro and mint. Serve with turkey over rice. Add sliced avocado for some good fats!
  3. If packing for meals, pack 4 (3) cup bowls with rice on the bottom and turkey mixture layered on top. Keep vegetable mixture and sauce in separate containers. When ready to eat, heat rice and meat, then add veggies and sauce. Add sliced avocado for some good fats!


As always, shoot me a message with any questions and let me know if you make it! Enjoy!

-G


Kitchen Adventures || Chimichurri Meatballs and putting a meal together!

Happy Hump Day! Hope everyone’s week is going well so far. My apologies on missing a post last week. I was still kind of fighting some illness, but I’m back! This week I have an easy meatball recipe for you, but also just a quick tidbit on packing for the week. So far I’ve pretty much just posted single recipes, but that’s not how we eat. We generally have 2-3 items to create a “meal.” Depending on the recipe obviously and what needs reheated or stays cold, I’ll pack meals in different ways.

This week I made meal ‘bowls’ (they are actually rectangular dishes :P) to get us a through a few days of lunches. I use these 3 cup Pyrex dishes pretty much EVERY week. They are a great size for a meal (depending on what you are cooking). I’ve had mine for a few years now and I can say they’ve held up pretty well! Anyway, the recipe and amounts I made this week filled four of these which meant Tim and I could each have 2 days of lunches from it!

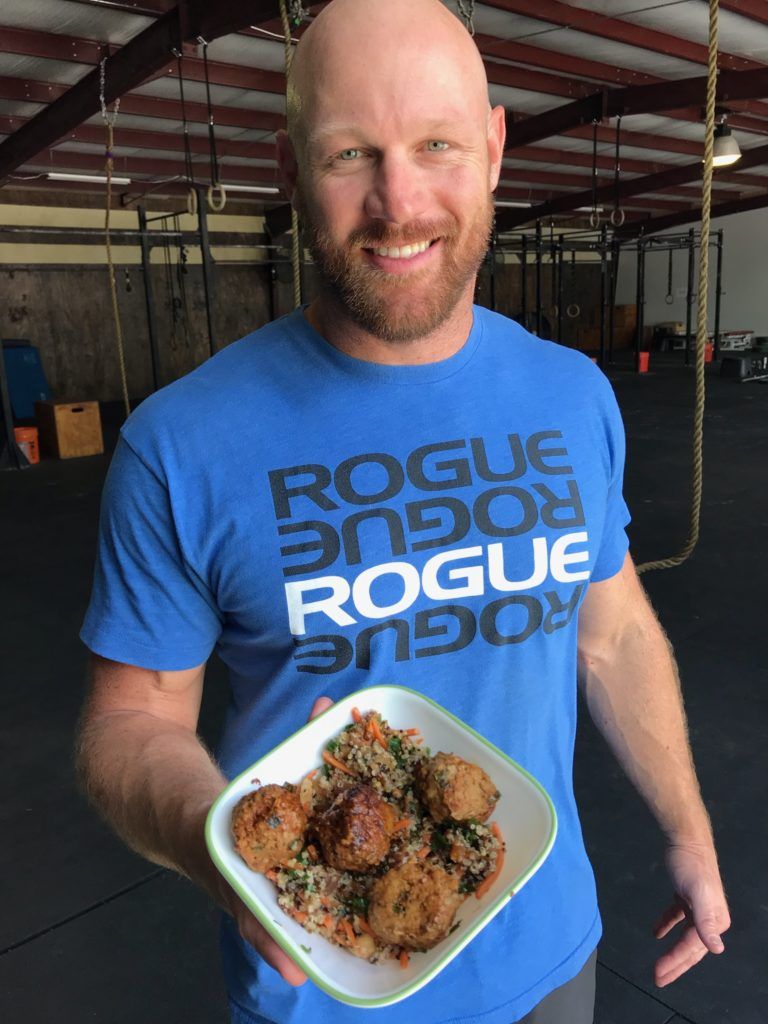
I love doing meatballs as a meal prep because they are easy, portable, and reheat very well. There are so many different ways you can do them. This week we have meatballs with a chimichurri sauce and roasted cauliflower and beets. Enjoy!

Chimichurri Meatballs

Ingredients
For the Meatballs
  • 1 lb ground turkey
  • 1/2 lb ground beef
  • 1/2 cup breadcrumbs I used Panko – if you want to sub Almond Flour you may, but cut it down a bit
  • 2 green onions minced
  • 3 cloves garlic minced
  • 1/2 tsp salt
  • 1/2 tsp black pepper freshly ground
  • 1 egg
  • 1/2 cup feta cheese crumbled (to top)
For the Chimichurri Sauce
  • 1/2 cup parsley minced – I prefer flat leaf, but you can use curly
  • 1/2 cup olive oil
  • 1/4 cup red wine vinegar
  • 1 tbsp fresh oregano chopped
  • 1/2 tsp red pepper flakes
  • 1 tbsp lemon juice
  • 1/2 tsp salt
  • 1/2 tsp black pepper freshly ground
Directions

Preheat your oven to 400 degrees.

In a large bowl, combine the ground turkey, ground beef, breadcrumbs, green onions, garlic, salt, black pepper and egg. 

Form the meatballs into small 1 inch balls and place them on a baking sheet lined with parchment paper.

Bake them for 20 to 25 minutes at 400 F degrees or until done to your liking.

While the meatballs are baking, in a medium size bowl, whisk together the parsley, olive oil, red wine vinegar, oregano, red pepper flakes, lemon juice, salt and pepper. Let it sit out at room temperature until the meatballs are ready.

Top with your chimchurri sauce and crumbled feta and Enjoy! 

*I was able to get about 25 meatballs from this recipe


For my veggies this week I went simple. I actually started my beets before I did anything else since they tend to take longer, but because I needed the oven at 400 degrees anyway, I did simple roasted beets and cauliflower.

For this, I used 3 large beets. I’ll wash them and trim the roots and tops, but leave the skin on. I coat them in coconut oil and wrap each one (whole) in aluminum foil. Roast at 400 for appx. 40 minutes (or until softened). Then, you can either rub the skins off with a paper towel (let them cool some) or just leave them on!

For the cauliflower, I used a whole head. Wash and cut it into florets. I coated this batch lightly in olive oil and seasoned it with salt, pepper, and a bit of garlic powder. I roasted it about 20 minutes (until the edges start to crisp).

To put it all together, I filled half the container with beets and half with cauliflower and then added 4-5 meatballs per dish. I leave the chimichurri off so that I can reheat the veggies and meatballs and then spoon the chimichurri on cold. Easy!

As always, shoot me a message if you have any questions and if you make any cool additions I’d love to hear them!


/* */